
CODE PAGE
DATA WITH NODE
Here are ways to read and write data with NodeJS. This page has code examples for the first three. See the DATABASE code page for how to use a database on the Sheridan Server with NodeJS and cPannel.
- Flat File - read and write to a text file
- JSON - send and receive with Fetch() API
- Sessions - read and write to server variables
- MySQL - read and write to a database (see DATABASE)
FLAT FILE
A basic way to save data is in a text file. You can store each record on a line in a delimited file.
I ran Dan Zen for 10 years this way with no problems at all. Tens of thousands of files.
// spirogram.txt - pipe delimited file with url|email|date

https://www.gurlpages.com|Laurenlynne12@hotmail.com|99/6/22
https://www.homestead.com|kjdysinger@netzero.net|99/6/27
https://www.ioc.com|wcoates@iocnet.net|99/6/28
- Follow the NODE INFO instructions to make an app called nodedata
- Make sure you are in VS Code with only the nodedata directory
- Make sure you do the npm init
- Install Express. In the terminal type:
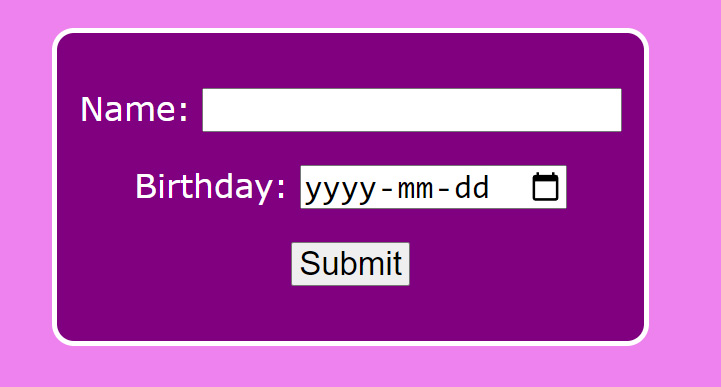
- Make a public folder and add this flatfile.html
- Note: we are going to handle a few different examples all with a single app
- Make flatfileresults.html in the public folder:
- Make app.js in the nodedata folder:
- Open the Terminal (CTRL `) or pull up from the bottom of VS Code
- Run the app:
- Open the app in the browser at http://localhost:3000/flatfile.html
- Submit the form and note the flatfile.txt file in the nodedata folder
- Submit the form a couple times and open up the flatfile.txt to see its content
- We are going to make a joke-telling page use the same app
- In the terminal, use CTRL C to stop running the app
- Install the one-liner-joke package from npm
- We will make a new HTML page send and receive data without reloading
- Make json.html in the public folder:
- In the app.js file beneath the get() and above the listen() add:
- Run the app again:
- Open the app in the browser at http://localhost:3000/json.html
- Submit the form and note the result shows on the same page!
- Sessions can be used to store and retrieve data per user computer
- This is like cookies, sessionStorage and localStorage but on the server
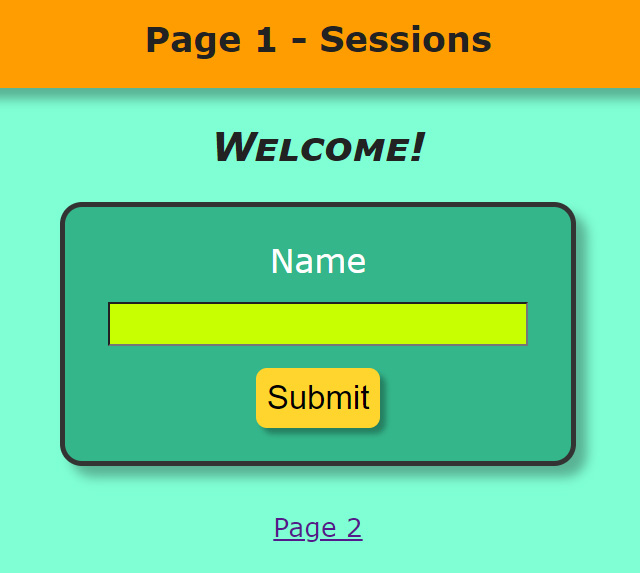
- In this example we save a username on page1 to use on page2
- Thanks Wendi Jollymore for the app code
- We will still use the same app.js
- Install express-session in the Terminal (CTRL `) or pull up from bottom
- Also install ejs as we are going to use templates
- MVC - Model View Controller - is a common design pattern
- Model holds code that deals with data
- View holds code that creates what is seen
- Controller works between to update the view and data
- This app has no model - but we will make views and a controller
- Make a views folder in the nodedata folder
- Add two pages page1.ejs and page2.ejs to views
- page2.ejs - note the ejs extension, not html
- Add the sessions.css page in the public folder
- Recall, we are using MVC - we just made the view
- Now make a controllers folder in the nodedata folder
- Add a controller.js page to the controllers folder (note the js extension)
- In the app.js file beneath the post() and above the listen() add:
- Use CTRL C to stop running the app - or use nodemon
- Run the app again:
- Load the app at http://localhost:3000/page1 in a browser
- BEFORE filling the name field note the plain welcome on page1 and page2
- Fill in the name field and see the new welcome on page1 and page2
- Without sessions, we would not know the name on page2
// Install Express:
npm i express
<!doctype html>
<html>

<head>
    <meta charset="utf-8">
    <title>Flat File</title>
    <meta name="viewport" content="width=device-width, initial-scale=1.0">

    <style>
        body {
            font-family:verdana;
            font-size:30px;
            text-align: center;
            background-color: violet;
            color:white
        }
        form {
            margin-top:40px;
            border:thick white solid;
            display:inline-block;
            border-radius: 20px;
            padding:20px;
            background-color:purple;
        }
        input {
            font-size:30px;
        }

    </style>


</head>

<body>

    <form action="flatfile" method="get">
        <p>Name: <input  type="text" required name="name"></p>
        <p>Birthday: <input type="date" required name="birthday"></p>
        <p><input type="submit"></p>
    </form>

</body>

</html>
<!doctype html>
<html>

    <head>
        <meta charset="utf-8">
        <title>Results - Flat File</title>
        <meta name="viewport" content="width=device-width, initial-scale=1.0">

        <style>
            body {
                font-family:verdana;
                font-size:30px;
                text-align: center;
                background-color: violet;
                color:white
            }
            div {
                margin-top:40px;
                border:thick white solid;
                display:inline-block;
                border-radius: 20px;
                padding:20px;
                background-color:purple;
            }
            input {
                font-size:30px;
            }

        </style>
    </head>

    <body>

        <div id="message"></div>

        <script>
            // get the results from the query string for message
            const message = new URLSearchParams(location.search).get("message");
            document.getElementById("message").innerText = message;
        </script>

    </body>

</html>
const fs = require("fs"); // for reading and writing files (comes with node)
const express = require("express");
const app = express();

app.set("port", process.env.PORT || 3000);

// set where static files such as html, images, css pages are located
app.use(express.static('public'));

// FLAT FILE

app.get("/flatfile", (req, res)=>{

    // get data can be collected with req.query
    // this is an object with properties that match the names of the form fields
    console.log(req.query);

    const name = req.query.name;
    const birthday = req.query.birthday;
    const data = name + "|" + birthday + "\n";

    let message = "Saved Birthday";

    // We want to append to a file - but you can also do the following:
    // fs.readFile(file, encoding, callback)
    // fs.writeFile(file, content, callback)
    // fs.unlink(file, callback) // to delete

    fs.appendFile("flatfile.txt", data, err => {
        if (err) message = "Sorry, error writing Birthday";
    });

    // later we will see the Fetch API (similar to AJAX)
    // to save data without going to another page
    res.redirect("flatfileresults.html?message=" + message);

});


app.listen(app.get("port"), ()=>{
    console.log("running on " + app.get("port"));
});// type this in the terminal and press enter node app
JSON AND FETCH
// type this in the terminal and press enter
npm i one-liner-joke

<!doctype html>
<html>

<head>
    <meta charset="utf-8">
    <title>JSON and Fetch()</title>
    <meta name="viewport" content="width=device-width, initial-scale=1.0">

    <style>
        body {
            font-family:verdana;
            font-size:30px;
            text-align: center;
            background-color: #ccc;
            color:white
        }
        form {
            margin-top:40px;
            border:thick white solid;
            display:inline-block;
            border-radius: 20px;
            padding:20px;
            background-color:#333;
        }
        input {
            font-size:30px;
        }
        #answer {
            display:none;
            margin:50px;
            padding:20px;
            background-color: #333;
            font-style:italic
        }
        #warning {
            display:none;
            margin:50px;
            font-size:20px;
            background-color: orange;
            padding:10px;
            color:#333
        }
        footer {
            margin:40px;
            font-size:12px;
            font-style:italic;
            color:#888;
        }

    </style>

    <script>

window.addEventListener("DOMContentLoaded", ()=>{

    const warning = document.getElementById("warning");
    const answer = document.getElementById("answer");
    const topic = document.getElementById("topic");

    document.getElementById("joke").addEventListener("submit", e=>{

        const senddata = JSON.stringify({topic:topic.value});
        console.log(senddata);

        // We want to send JSON to the server and get back a response
        // without loading a new page or reloading this page
        // In the past we used AJAX (Asynchronous JavaScript and XML)
        // which usually we used with JSON rather than XML.
        // This can still be used but we have a new way:

        // fetch() is a JavaScript API that basically replaces AJAX
        // it can be used with Promises (as we have here)
        // or with async and await (not shown)

        // fetch() is simpler when not sending JSON
        // it would just be fetch("getjoke").then(...).then(...)
        // but in this case, we want to send JSON too:

        fetch("getjoke", {
            method:"POST",
            headers: {"Content-Type": "application/json"},
            body: senddata
        }).then(response=>{
            // getting a response back from the server
            // the two then() steps is how it is done
            // we could return response.text() if not receiving JSON
            return response.json();
        }).then(data=>{

            // data is the JSON from our response
            console.log(data);
            data = JSON.parse(data);

            if (data.warning != "") {
                warning.innerHTML = data.warning + ", but here is a joke anyway!";
                warning.style.display = "block";
            } else {
                warning.style.display = "none";
            }

            answer.innerText = data.joke;
            answer.style.display = "block";

        }).catch(err=>{
            // There was an error
            warning.innerText = err;
            warning.style.display = "block";
        });

        e.preventDefault(); // do not submit the form

    });

});

    </script>
</head>

<body>

    <form id="joke">
        <p>Enter Joke Topic</p>
        <p><input  type="text" id="topic"></p>
        <p><input type="submit" value="GET JOKE"></p>
    </form>

    <div id="warning"></div>
    <div id="answer"></div>

    <footer>We are not responsible for joke content</footer>

</body>

</html>
// JSON AND FETCH

// use a joke package - there are a bunch of them - do a search at https://npmjs.com
const oneLinerJoke = require('one-liner-joke');

// this will route any JSON data to the req.body
app.use(express.json())

// route getjoke
app.post("/getjoke", (req, res)=>{

    let topic = req.body.topic;

    console.log("topic = " + topic);

    // use one-liner-joke package
    // returns a joke with the following format:
    // {
    //    "body":"Artificial intelligence is no match for natural stupidity.",
    //    "tags":["intelligence","stupid"]
    // }

    let joke;
    let warning = "";

    // the joke filter seems to break the app
    // if we use any of the default filtered words
    // so filter out the default filtered words
    const filter = ['racist', 'dirty', 'sex', 'blonde'];
    if (filter.includes(topic)) {
        topic = "";
        warning = "Sorry, please be good";
    }

    if (topic == "") joke = oneLinerJoke.getRandomJoke(); // no topic
    else joke = oneLinerJoke.getRandomJokeWithTag(topic); // topic

    // but there may be no jokes for the topic
    if (joke.body == "") {
        warning = "Sorry, no jokes about " + req.body.topic;
        joke = oneLinerJoke.getRandomJoke();
    }

    // create json to send back
    const data = JSON.stringify({warning:warning, joke:joke.body});

    // send the json back
    res.json(data);

});// type this in the terminal and press enter node app // or use nodemon: npm i -D nodemon // then add "start":"nodemon app.js" in the script of package.json (and comma above) // npm start
SESSIONS
// Type this in terminal and press enter
// note that we are importing two packages
npm i express-session ejs
MVC
<html lang="en">

<head>
    <meta charset="utf-8">
    <title>Page 1 - Sessions</title>
    <meta name="viewport" content="width=device-width, initial-scale=1.0">
    <link rel="stylesheet" href="sessions.css">
</head>

<body>

    <header>
        <h1>Page 1 - Sessions</h1>
    </header>

    <div id="welcome">

        <% if (session.username) { %>
            <h2>Welcome, <%= session.username %>!</h2>
        <% } else { %>
            <h2>Welcome!</h2>
        <% } %>

    </div>

    <% if (!session.username) { %>
        <form action="getuser" method="post">
            <label for="username">Name
                <br>
                <input type="text" id="username" name="username" required>
            </label>
            <br>
            <input type="submit">
        </form>
    <% } %>

    <footer>
        <a href="page2">Page 2</a>
    </footer>


</body>

</html><html lang="en">
<head>
<meta charset="utf-8">
<title>Page 2 - Sessions</title>
<meta name="viewport" content="width=device-width, initial-scale=1.0">
<link rel="stylesheet" href="sessions.css">
</head>
<body>
<header>
<h1>Page 2 - Sessions</h1>
</header>
<div id="welcome">
<% if (session.username) { %>
<h2>Welcome, <%= session.username %>!</h2>
<% } else { %>
<h2>Welcome!</h2>
<% } %>
</div>
<footer>
<a href="page1">Page 1</a>
</footer>
</body>
</html>body {
background-color:aquamarine;
font-family:verdana;
color:#222;
text-align: center;
margin:0px;
}
header {
margin:0px;
padding:5px;
background-color: rgb(255, 157, 0);
box-shadow: rgba(0,0,0,.3) 0px 10px 10px;
}
form {
margin:10px;
padding:30px;
display:inline-block;
border-radius: 20px;
border:thick solid #333;
background-color: rgb(52, 182, 139);
font-size:30px;
color:white;
width:90%;
max-width:400px;
box-shadow: rgba(0,0,0,.3) 10px 10px 10px;
}
input {
margin-top:20px;
font-size:30px;
}
input[type=text] {
background-color: rgb(200, 255, 0);
}
input[type=submit] {
box-shadow: rgba(0,0,0,.3) 5px 5px 5px;
padding:10px;
border:none;
cursor:pointer;
border-radius: 10px;
background-color: rgb(255, 213, 45);
}
input[type=submit]:hover {
background-color: rgb(200, 255, 0);
}
footer {
margin:30px;
font-size:24px
}
#welcome {
font-size:24px;
font-variant: small-caps;
font-style: italic;
margin:30px 0px -10px 0px;
}exports.showPage1 = (req, res) => {
res.render("page1", { session: req.session });
}
exports.getUser = (req, res) => {
req.session.username = req.body.username;
res.render("page1", { session: req.session });
}
exports.showPage2 = (req, res) => {
res.render("page2", { session: req.session });
}// SESSIONS
// controllers holds our app code to make the express code less
controller = require("./controllers/controller");
// import session
const session = require('express-session');
// use session
app.use(session({
secret: "secretkey",
saveUninitialized: false,
resave: false
}));
// set the template engine
app.set("view engine", "ejs");
// handle get requests to page1
app.get("/page1", controller.showPage1);
// handle get requests to page2
app.get("/page2", controller.showPage2);
// other requests have post data
app.use(express.urlencoded({ extended: false }));
// handle post requests to getuser
app.post("/getuser", controller.getUser);// type this in the terminal and press enter node app // or npm start if using nodemon
CONCLUSION
We have seen three ways that NodeJS can deal with data:
- Flat Files
- JSON and Fetch
- Sessions
FULL Sheridan Node documentation can be found in Wendi Jollymore's Lessons.